How to Take Stunning Textile Photos for Your Portfolio?
Capturing stunning textile photos is essential for any portfolio aiming to impress potential clients. With textile markets predicted to grow significantly, embracing effective photography techniques can set your work apart. According to a recent report by the Textile World Association, high-quality images can increase customer engagement by up to 75%.
Expert photographer Sarah Lin, known for her textile work, once remarked, “Textile photos need to tell a story, reflecting both texture and emotion.” This insight reminds us that it’s not just about sharp images; it's about the narrative they convey. However, many struggle with dynamic lighting or accurate color representation. It’s a challenge that requires constant practice and refinement.
As we look forward to events like the 139th Canton Fair, showcasing textiles with compelling visuals can be more crucial than ever. With AI-driven tools enhancing the selection process for buyers, the competition is stiff. Photographers must evolve, honing their skills to adapt to these advancements while maintaining authenticity in their textile photos.
Choosing the Right Equipment for Textile Photography
When it comes to textile photography, choosing the right equipment is crucial. A decent camera with a good resolution is a must. Look for features that enhance macro shots, as texture matters. A DSLR or mirrorless camera often works well. A lens with a focal length of 50mm or more can help capture details clearly.
Lighting is another essential factor. Natural light often brings out the best colors and textures. You might want to shoot near a window, but beware of harsh sunlight. Soft, diffused light can make a big difference. Experiment with reflectors or diffusers to control shadows. A sturdy tripod can help stabilize shots, especially in low light.
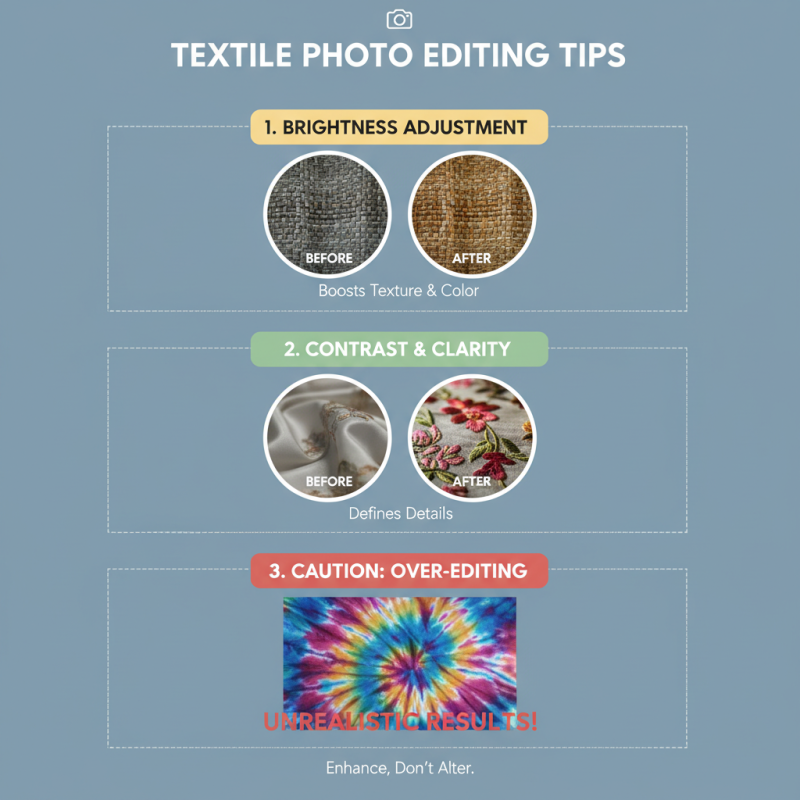
You may find that some photos don’t turn out as expected. Sometimes, colors can appear washed out. Other times, textures may not be as vivid. Analyzing these shortcomings is part of growth. Take time to review your work. Consider adjusting settings or trying different angles. Each shot can teach you something new about capturing textiles beautifully.
Understanding Lighting Techniques for Textile Photography
Lighting is crucial in textile photography. It can elevate a simple piece of fabric into a stunning visual. Natural light works well for softer textures. Position your fabric near a window. The sunlight creates beautiful shadows and highlights. However, watch for harsh glare. Soft, diffused light is often better. You might need to use sheer curtains to control intensity.
Artificial lighting has its challenges. You can achieve consistent results with studio lights. Softboxes and diffusers help to create an even light distribution. Experimenting with angles is key. Slight changes can dramatically alter the outcome. Be aware that different materials may reflect light differently. Synthetic fabrics might create unwanted shine.
Consider the mood you want to convey. Warm light can evoke comfort, while cool tones often feel modern. Remember that your choice of light impacts the color representation. Test shots are vital. Sometimes colors appear flat or washed out. Adjust your lighting set-up until you find the perfect balance. With patience and practice, your textile photos can truly shine.
Textile Photography Lighting Techniques
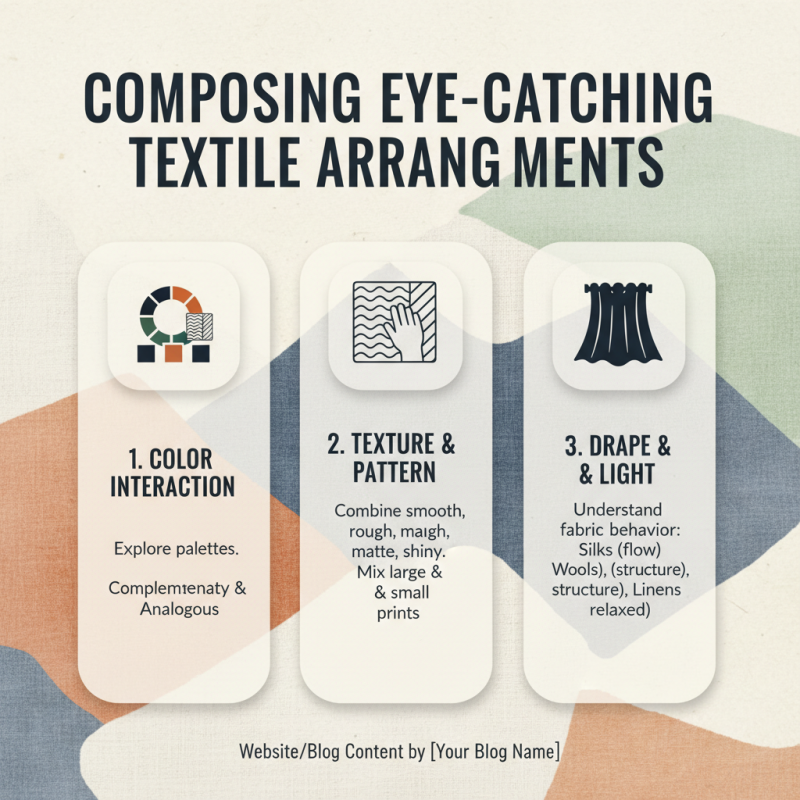
Composing Eye-Catching Textile Arrangements
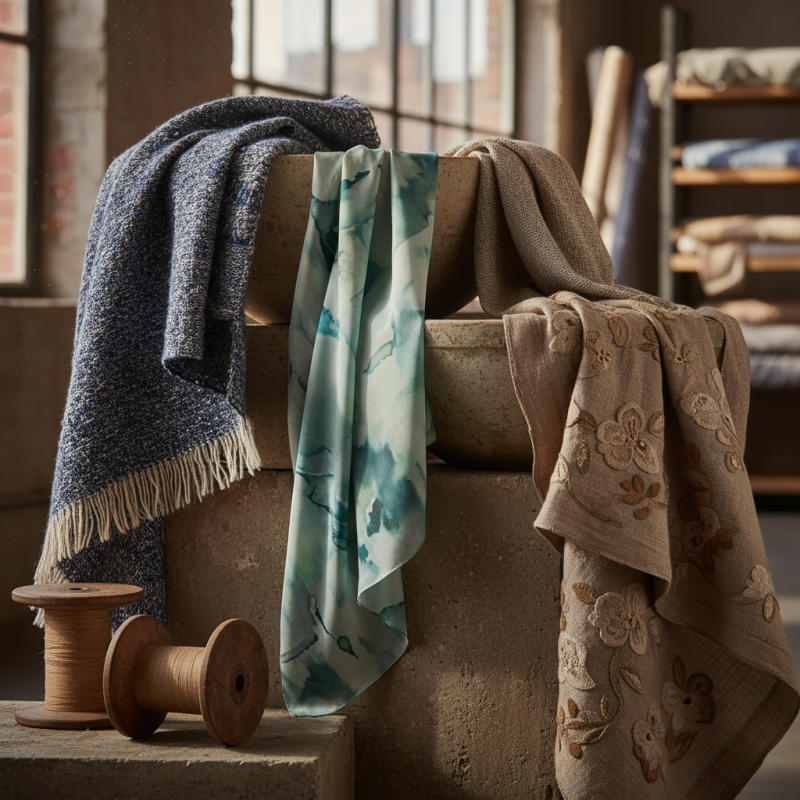
Creating visually appealing textile arrangements is a unique challenge. Colors, textures, and patterns interact in fascinating ways. Start by exploring different fabrics. Silks, wools, and linens behave differently. They drape, fold, and reflect light uniquely.
Consider the background. A neutral backdrop can make vibrant textiles pop. Alternatively, a patterned background can create a dynamic scene. Experiment with various setups. A messy table might reflect creativity, but could also distract. Focus on balance and harmony in your arrangement.
Lighting plays a crucial role too. Natural light enhances colors. However, harsh sunlight can wash out details. Use soft diffused light to capture subtle textures. Remember, imperfections can add character. Wrinkles or uneven placement may tell a story. Embrace those moments; they bring authenticity to your portfolio.
Showcasing Your Textile Photos in a Portfolio Format
Creating a striking textile portfolio requires thoughtful presentation. Each photo should tell a unique story. Focus on lighting and textures that highlight the fabric’s qualities. Use natural light whenever possible. It enhances colors and reveals intricate patterns. Consider using a solid background to emphasize the textile's details.
Arrangement matters immensely. Place images in a cohesive order, guiding the viewer’s eye smoothly. Group similar fabrics together, or mix different patterns to create contrast. An imperfect arrangement can sometimes evoke emotion. Show one fabric with a slight wrinkle or a frayed edge. It tells a narrative of use and history.
Don’t shy away from including close-ups. They can reveal the craftsmanship and subtlety. Experiment with angles; a shot from below can make a textile appear grand. Sometimes, blurred backgrounds can add depth, but ensure the main focus is still clear. Include raw, unedited moments, showcasing the journey of your art. This imperfection can spark discussions and invite reflections.